
FREE Magician Teensy (from Rayman) Crochet Pattern

A decade ago (literally 2014), I made a little version of the Magician Teensy from Rayman Legends, and I made a totally useless blog post with very lazy instructions. It might be one of my most unhinged blog posts from the ye olde days, and you can see it right here if you want some lols. For years I've been wanting to remake this and make an actual pattern. After a great struggle, I finally did it.
This version is larger (because I hate working small because I can't see anymore), and it's not in slip stitch (because wtf why did I make this entire thing in slip stitch anyway). You can absolutely use this pattern as a base for other Teensies or even Rayman if you're smort.
You can snag a PDF, ad-free version of the pattern here (which is also free of all these extra rambling words). The paid version includes a lot of additional images not included in this post, for some bonus help with assembly should you need it.
Now, hear me out, I know the Magician I made that's pictured throughout this pattern is the WRONG colors. I would love to say I did this for better visibility in the accompanying images, but that isn't the case at all. I wanted to do his cloak and hat in dark purple. I thought I had dark purple yarn - I didn't. I have so very much yarn (and unlike a lot of other yarn people) I didn't want to buy more, especially when so little was needed for this, and it's a free pattern, and I'm keep this guy and idgaf about the colors. I very rarely use purple for anything, for whatever reason. But lets be honest here, you can use whatever gosh dang colors you want for anything you make, and getting into someone borthole about color choices for a personal project is absurd.
Anywho, I am finished with these introduction words.
PLEASE READ OVER (AT LEAST SKIM) THE ENTIRE PATTERN BEFORE YOU BEGIN.
Do not be asking me questions about a free pattern, my dudes. I am busy. Hence why this free pattern came at the end of the month instead of the middle of the month, as I had originally intended.
Materials and Supplies
• Worsted weight yarn in light blue, medium purple and/or a magenta color (I think the band on the hat is more pink-ish than the guy's robe), darker purple or black, and a bit of yellow, black, and white
• Size F crochet hook or whatever size for your yarn if you don’t roll with worsted
• Yarn needle
• Pins (optional, but recommended for positioning the parts before attaching – I use bobby pins)
• Stitch marker (optional, but recommended for marking the beginning/end of rnds because these babies are going to be continuous)
• Your favorite stuffing material
• TOTALLY OPTIONAL: weighted stuffing material and something to hold it (like a nylon ankle stocking) – you can put this in the bottom of your teensy to help him to stand on his own without needing to prop against something
Abbreviations/Skills Needed
• Ch: chain
• Sc: single crochet
• Sl: slip stitch
• Inc: increase
• Dec: decrease (invisible decrease, working into the front loops when working in the rnd)
• BLO: back loops only
• FLO: front loops only
• St/sts: stitch/stitches
• Rnd/rnds: round/rounds
Whip stitch/running stitch can be used to join the pieces. You can use whichever you prefer.
Gauge: approx. 4 sts/in and 4 rows/in. but gauge is not all that important unless you really need a particular size for some reason. To resize, I recommend changing needles and/or yarn.
Finished Magician Teensy as patterned measures about 9" tall from his bottom to the top of his hat and also about 9" from the end of his nose to the top of his hat.
NOTE: any instances of BLO/FLO in the pattern are for the noted rnd ONLY, return to regular sc in the following rnd
PATTERN
Total sts in row/rnd are noted in parentheses ().
HEAD
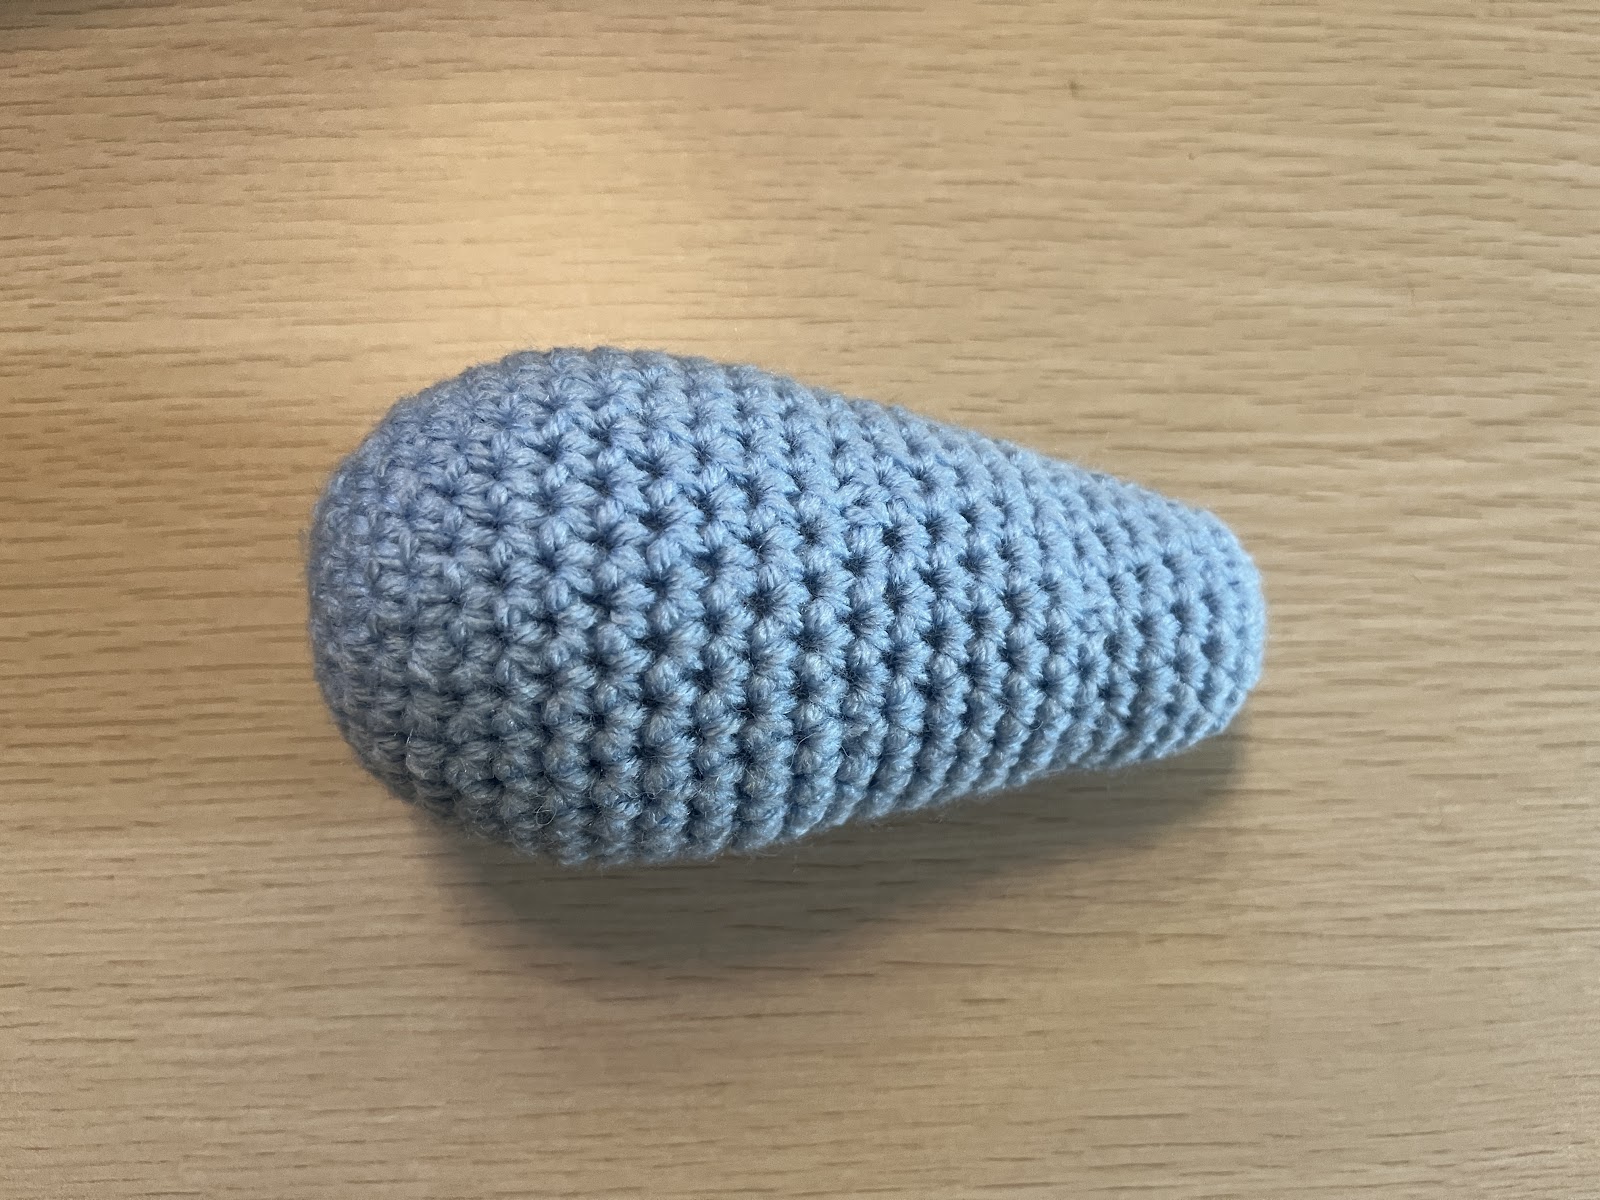
The head is a rounded oblong shaped thing that tapers off at one end. Start at the nose-end using light blue.
Rnd 1: ch 2, sc 6 in 2nd ch from hook (6);
I’m a ch 2 gal, but you can do a magic loop if you want!
Rnd 2: inc around (12);
Rnd 3: (sc, inc) x6 (18);
Rnd 4: sc around (18);
Rnd 5: (sc 2, inc) x6 (24);
Rnd 6: sc around (24);
Rnd 7: (sc 3, inc) x6 (30);
Rnds 8-15: sc around (30);
Start stuffing at any point during this section and continue stuffing as you go. Stuff moderately firm for shaping.
Rnd 16: (sc 3, dec) x6 (24);
Rnds 17-21: sc around (24);
Rnd 22: (sc 2, dec) x6 (18);
Rnds 23-27: sc around (18);
Rnd 28: (sc, dec) x6 (12);
Rnd 29: dec around (6), close hole, break off, pull tail inside.
BODY
This is going to be another oblong-shaped thing but bigger around and with a flat bottom. With blue, starting at the bottom.
Rnd 1: ch 2, work 7 sc in 2nd ch from hook (7);
Rnd 2: inc around (14);
Rnd 3: (sc, inc) x7 (21);
Rnd 4: (sc 2, inc) x7 (28);
Rnd 5: (sc 3, inc) x7 (35);
Rnd 6: (inc, sc 4) x7 (42);
Rnd 7: (sc 5, inc) x7 (49);
Rnd 8: BLO, sc around (49);
Rnds 9-11: sc around (49);
Rnd 12: (sc 5, dec) x7 (42);
Rnds 13-15: sc around (42);
Rnd 16: (dec, sc 4) x7 (35);
Rnds 17-19: sc around (35);
If you haven’t done so already, begin stuffing and continue stuffing as you go anytime now. The bottom should be flat so do not stuff so much that it bulges. If you want a weighted bottom, drop your weighted material here…in the bottom, and then your normal stuffing material the rest of the way.
Rnd 20: (sc 3, dec) x7 (28);
Rnds 21-23: sc around (28);
Rnd 24: (sc 2, dec) x7 (21);
Rnds 25-27: sc around (21);
Rnd 28: (sc, dec) x7 (14);
Rnd 29: sc around (14);
Rnd 30: dec acround (7), close hole and break off with a long tail for attaching the head. Attach the head and body as shown in the image below.

HAT
We are going to make this weird top hat in one piece. Start at the top end of the hat with purple (I ended up using a sort of default purple and more of a magenta color because it’s what I had on hand and the more I think about it, the more I think this guy wears black clothes, but here we are. Black is hard to see in pattern pictures anyway).
Rnd 1: ch 2, work 7 sc in 2nd ch from hook (7);
Rnd 2: inc around (14);
Rnd 3: (sc, inc) x7 (21);
Rnd 4: (sc 2, inc) x7 (28);
Rnd 5: BLO sc around (28);
Rnd 6: (sc 2, dec) x7 (21);
Rnds 7-8: sc around (21);
Rnd 9: (sc, dec) x7 (14);
Stuff the top part of the hat and be careful not to create a bulge at the very top, which should be flat. Continue stuffing as you go.
Rnds 10-13: sc around (14);
Rnd 14: (sc 5, dec) x2 (12);
Rnd 15: sc around (12);
Rnd 16: (sc 4, dec) x2 (10);
Rnd 17: sc around (10);
Rnd 18: (sc, inc) x5 (15);
Rnd 19: sc around (15), switch to your lighter purple/magenta at the end of this rnd. Don’t break off your other color. You’re going to pick it up again in a couple rnds, just let it hang out behind.
Rnds 20-22: sc around (15), change back to your other color at the end of rnd 22, and break off the lighter color.
Rnd 23: FLO (sc 2, inc) x5 (20);
Rnd 24: (sc 3, inc) x5 (25);
Rnd 25: (inc, sc 4) x5 (30), sl into the 1st st, break off with a long tail, which you can weave back and then use to attach the hat to the head. See below.

ROBE
We’re not going to be making a full robe that goes around this guy’s whole body, but instead just the front and we’re going to make an ILLUSION. With your lighter purple, start at the bottom edge.
Ch 28, and leave a long tail for sewing this to the body later;
Row 1: start sc in 2nd ch from hook and sc across (27), ch 1, turn;
Rows 2-7: sc across (27), ch 1, turn;
Row 8: dec, sc 23, dec (25), ch 1, turn;
Row 9: sc across (25), ch 1, turn;
Row 10: dec, sc 21, dec (23), ch 1, turn;
Row 11: sc across (23), ch 1, turn;
Row 12: dec, sc 19, dec (21), ch 1, turn;
Row 13: sc across (21), ch 1, turn;
Row 14: dec, sc 17, dec (19), ch 1, turn;
Row 15: dec, sc 15, dec (17), ch 1, turn;
Row 16a: sc 8 (8), ch 1, turn;
Row 17a: dec, sc 6 (7), ch 1, turn;
Row 18a: sc 5, dec (6), ch 1, turn;
Row 19a: dec, sc 4 (5), ch 1, turn;
Row 20a: sc 3, dec (4), break off.
Row 16b: rejoin yarn in the 2nd st from the end of row 16b, sc across (8), ch 1, turn;
Row 17b: sc 6, dec (7), ch 1, turn;
Row 18b: dec, sc 5 (6), ch 1, turn;
Row 19b: sc 4, dec (5), ch 1, turn;
Row 20b: dec, sc 3 (4), break off with a long tail to sew this side to the body.
Weave in the short tails on whatever side you want to be the back side of the piece.

Attach to body as shown.

CLOAK
Ch 31, with a long tail for attaching to the body later.
Row 1: begin sc in 2nd ch and sc across (30), ch 1, turn;
Rows 2-9: sc across (30), ch 1, turn;
Row 10: sc 13, dec 2, sc 13 (28), ch 1, turn;
Row 11: sc across (28), ch 1, turn;
Row 12: sc 12, dec 2, sc 12 (26), ch 1, turn;
Row 13: sc across (26), ch 1, turn;
Row 14: sc 11, dec 2, sc 11 (24), ch 1, turn;
Row 15: sc across (24), ch 1, turn;
Row 16: sc 10, dec 2, sc 10 (22), ch 1, turn;
Row 17: sc across (22), ch 1, turn;
Row 18: sc 9, dec 2, sc 9 (20), ch 1, turn;
Rnd 19: sc 8, dec 2, sc 8 (18), ch 1, turn;
Rnd 20: sc 7, dec 2, sc 7 (16), ch 1, turn;
Rnd 21: sc 6, dec 2, sc 6 (14), ch 1, turn;
Rnd 22: FLO sc across (14), ch 1, turn;
Rnd 23-24: sc across (14), break off with a long tail after row 24. Weave down the collar then use it to attach the cloak, overlapping the robe.

Finish attaching the cloak as shown below.

HANDS
We’re not going to be making whole hands. Just three (3) fingers stick out of each sleeve, so we’re just going to make three (3) fingers for each arm and sew them into the sleeves for more ILLUSION.
With blue, make 6, starting at the fingertip.
Rnd 1: ch 2, work 4 sc in 2nd ch from hook (4);
Rnds 2-4: sc around (4), break off after rnd 4. Two (2) of these need a long tail, the others can be cut short.

Group up the sets of fingers and use one of the ones with a long tail to stitch them together as shown. You don’t need to do anything fancy, just secure them all together in a row.

ARMS/CLOAK SLEEVES
Make 2, with whatever color you used for the hat and cloak, starting at the shoulder. Leave a long tail for attaching to the body. Note: you don’t need to stuff the arms if you’re working with worsted and F hook. You may want to stuff them if you’ve made your Teensy larger. I did not stuff the arms of the one I made for this pattern.
Rnd 1: Ch 2, work 5 sc in 2nd ch from hook (5);
Rnds 2-3: sc around (5);
Rnd 4: inc around (10);
Rnds 5-7: sc around (10);
Rnd 9: (sc 4, inc) x2 (12),
Rnds 10-12: sc around (12);
Rnd 13: (sc 2, inc) x4 (16);
Rnds 14-17: sc around (16), break off with a long tail after rnd 17.

Use the tail to stitch a group of fingers into the sleeve. See the image below for positioning. I used a running stitch working through the first layer of the sleeve, the fingers, then the second layer of the sleeve. I only worked the running stitch along the section with the fingers, but if you stuffed the arm, work it all the way across to close the opening with a flat seam.

Attach the arms about 2 rows below the start of the collar on the cloak.

EYES
Make 2, with black.
Rnd 1: ch 1, work 7 sc in 2nd ch from hook (7);
Rnd 2: inc around (14), sl into the 1st st, break off. Weave in your ends.
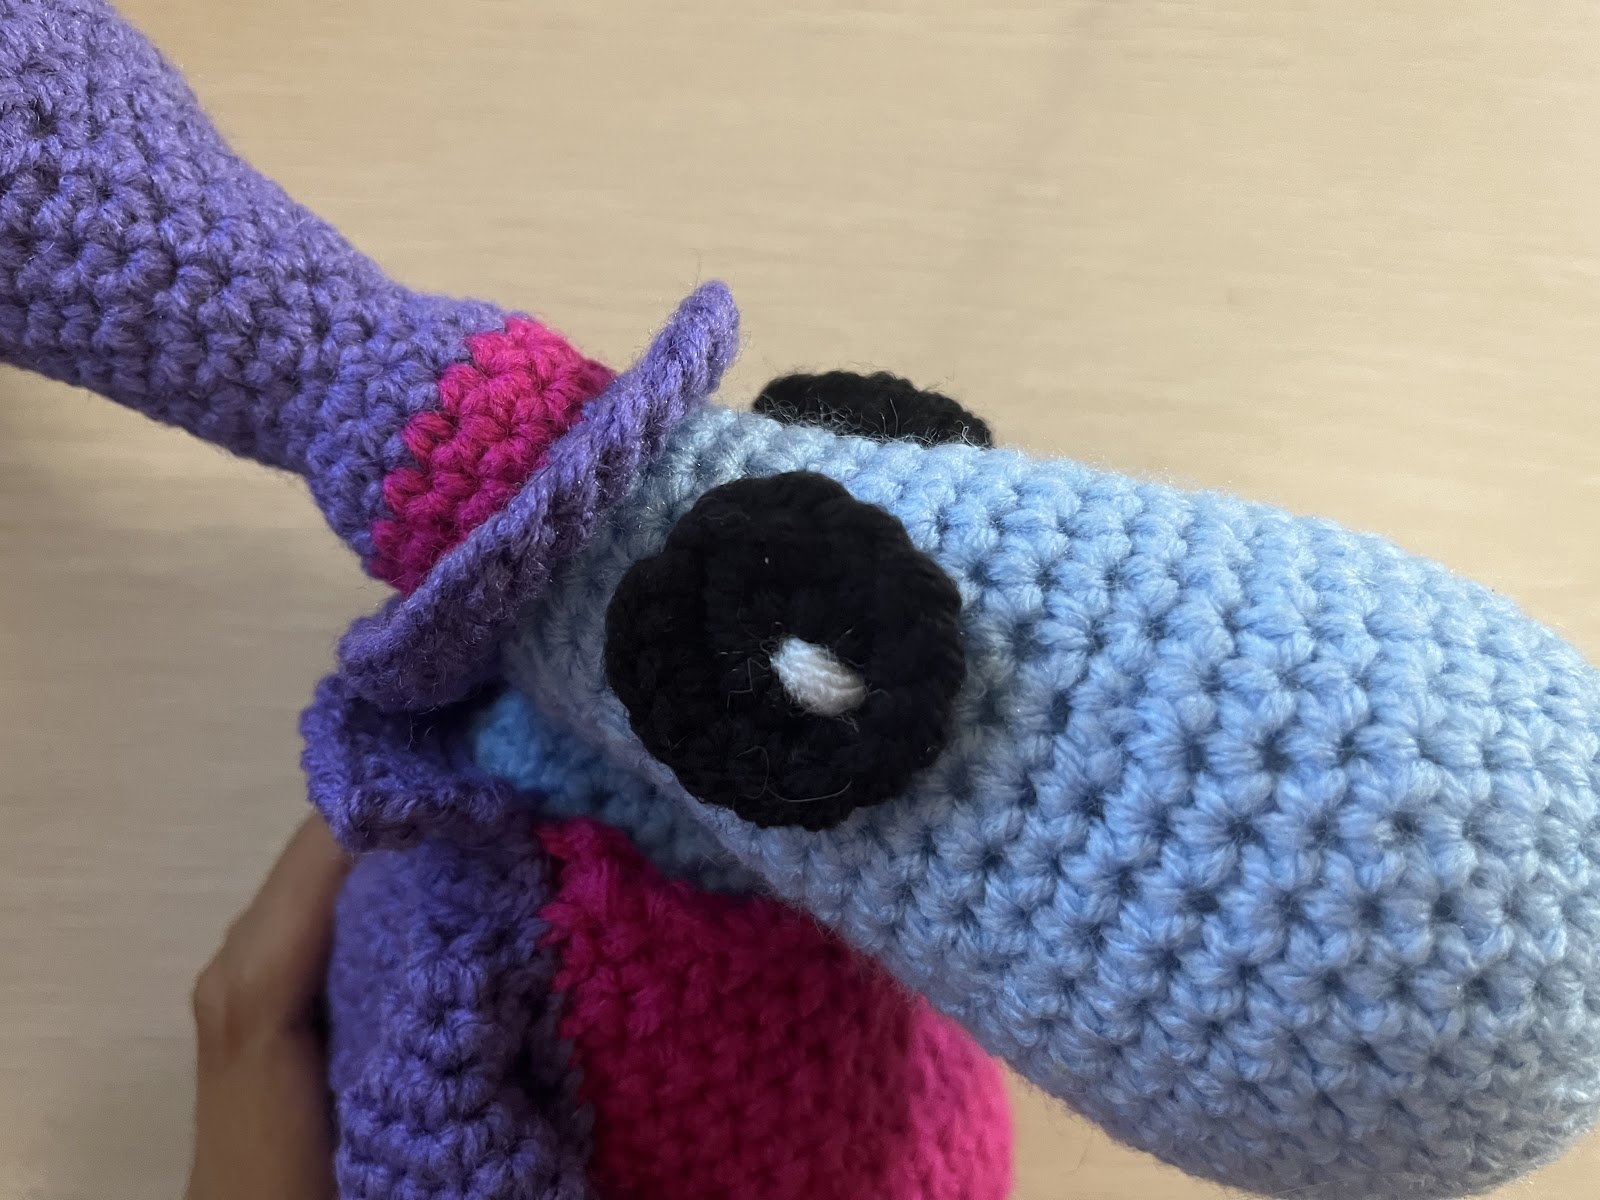
Attach the eyes to the face with a length of white yarn, which will also act as highlights in the eyes.
MOUTH
With a small length of black yarn and your yarn needle, embroider a stitch or two for the mouth on whichever side of the face.

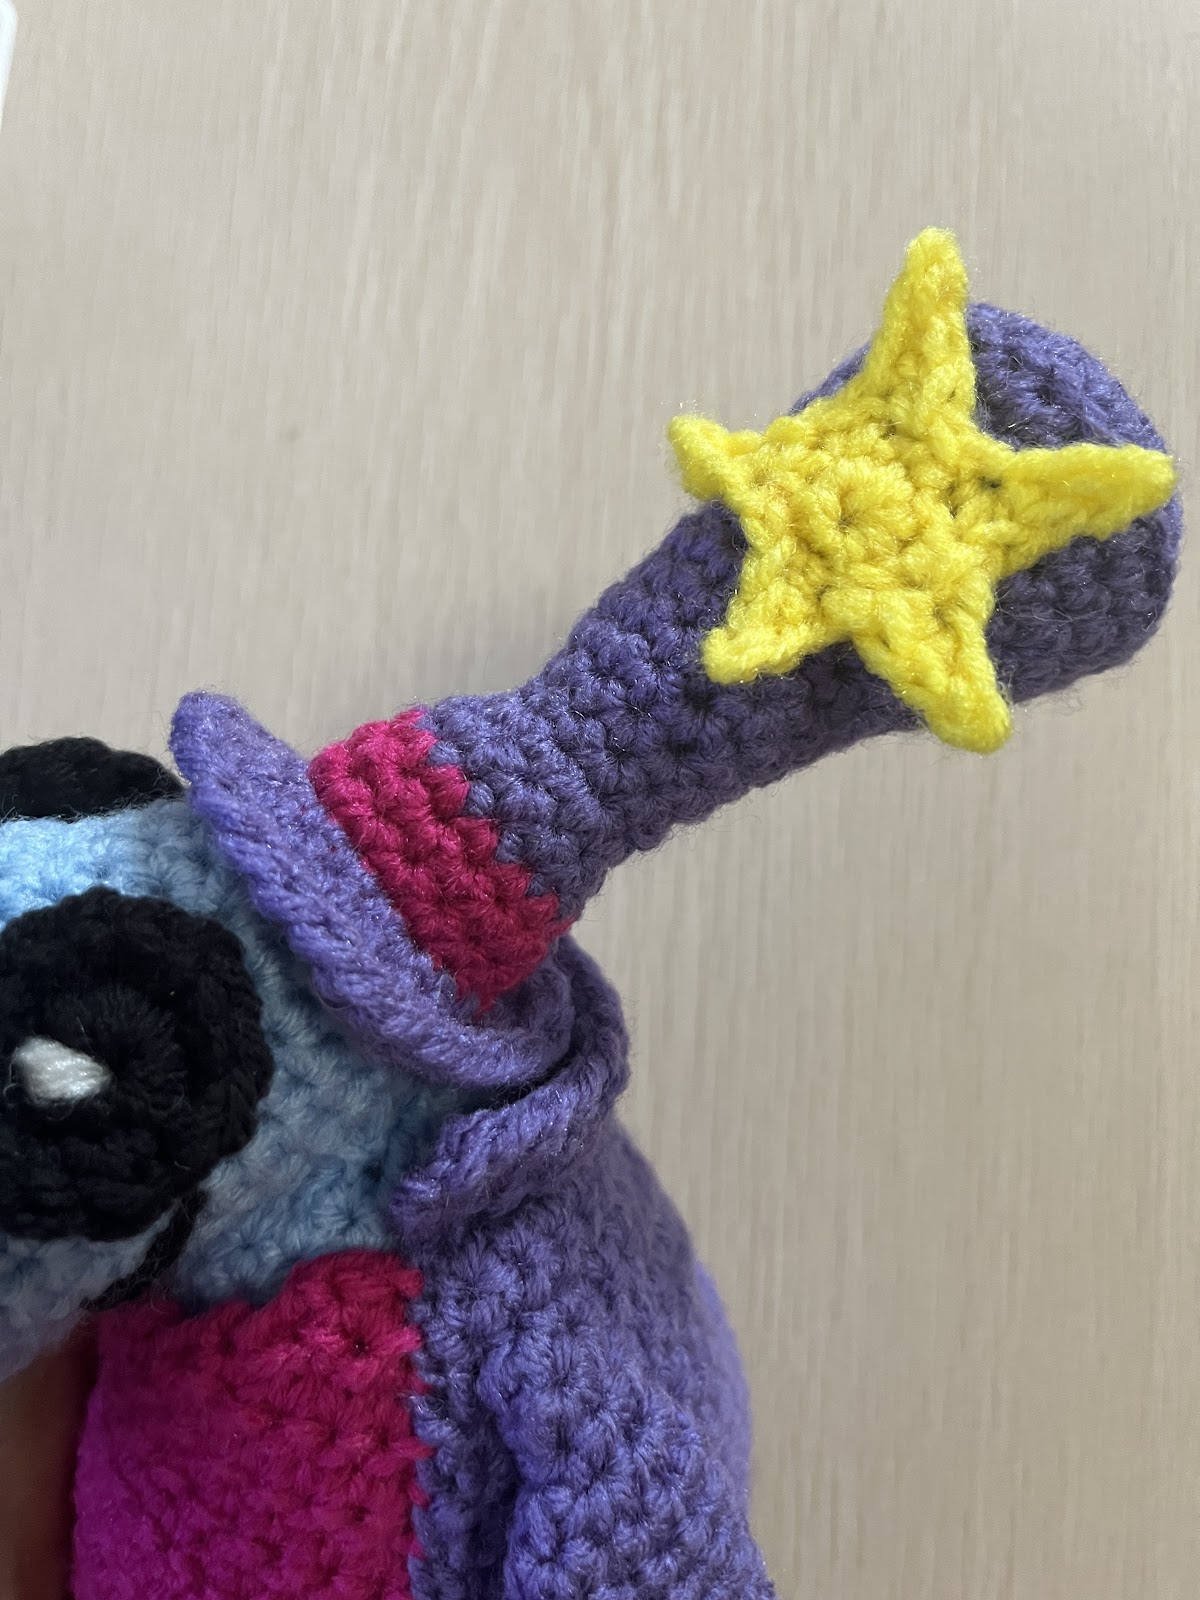
STAR (for hat)
This is started in the rnd then the arms of the star are going to be worked around the rnd in “rnd 2”. It will make sense when you do it. Maybe. With yellow, starting in the center of the star.
Rnd 1: ch 2, work 4 sc in 2nd ch from hook (4);
Rnd 2: (ch 4, sl in 2nd ch from hook, sc 2, sc into next open st of rnd 1) x5, when you finish the last arm, there won’t be an open st to sc into, so instead, sl into the bottom of that 1st chain. Break off with a long enough tail to sew it to the hat.
Weave in/pull inside any remaining tails.
DONE!
You can make and sell finished Magician Teensies but be sure to link back to this pattern and give appropriate credit. Please DO NOT duplicate or sell this pattern, or I will haunt you until the end of your days, and you will also have bad crafter karma, which you do not want.
There likely will NOT be a freebie pattern next month because I'm going an extra large batch of Phoenix Wright hats and they are slowly crushing my soul. XOXOX

Comments
Post a Comment