
My Friend Wilby FREE Crochet Pattern from Starfield!

UPDATE 9/21/23: Bethesda rolled out an inferior Wilby pattern the other day, if you didn't know. If you'd like to compare it to my version, which is larger (I was shooting for accurate game size) then you can get that pattern here.
I have been playing a great deal of Starfield. I am constantly encumbered by toys and potted plants. It's fine. Give me some pew-pew weapons, a spaceship, and let me collect cute plushies and plants for hours on end, which I'm piling in the middle of The Frontier because my cargo hold and captain's storage are full. Everything is full. Piles are the answer. Also, organs. Oh, my God. My dilemma with how to offload organs. Not the instrument, my dudes, I'm talking internal ones, which I steal.
Anywho! Free pattern! Because I am nice and also Bethesda loves the copyright police when fans of their games want to make a few dollarbucks. It is what it is. Just like my in-game hoarding. You can though get a pay-what-you-want PDF version from Ko-Fi if you want to throw some dollars my way for me taking the time to do this. I could have been playing Starfield, but I stopped to make this thing and type this pattern.
My Friend Wilby is cute af. Super duper easy pattern too!
Materials and Supplies
- Worsted weight yarn in two shades of the same color (e.g. dark red and regular red) and black for the mouth (or you can use the darker of your two colors)
- Two (2) 20mm safety eyes in black or a darker shade of whatever color you’re using
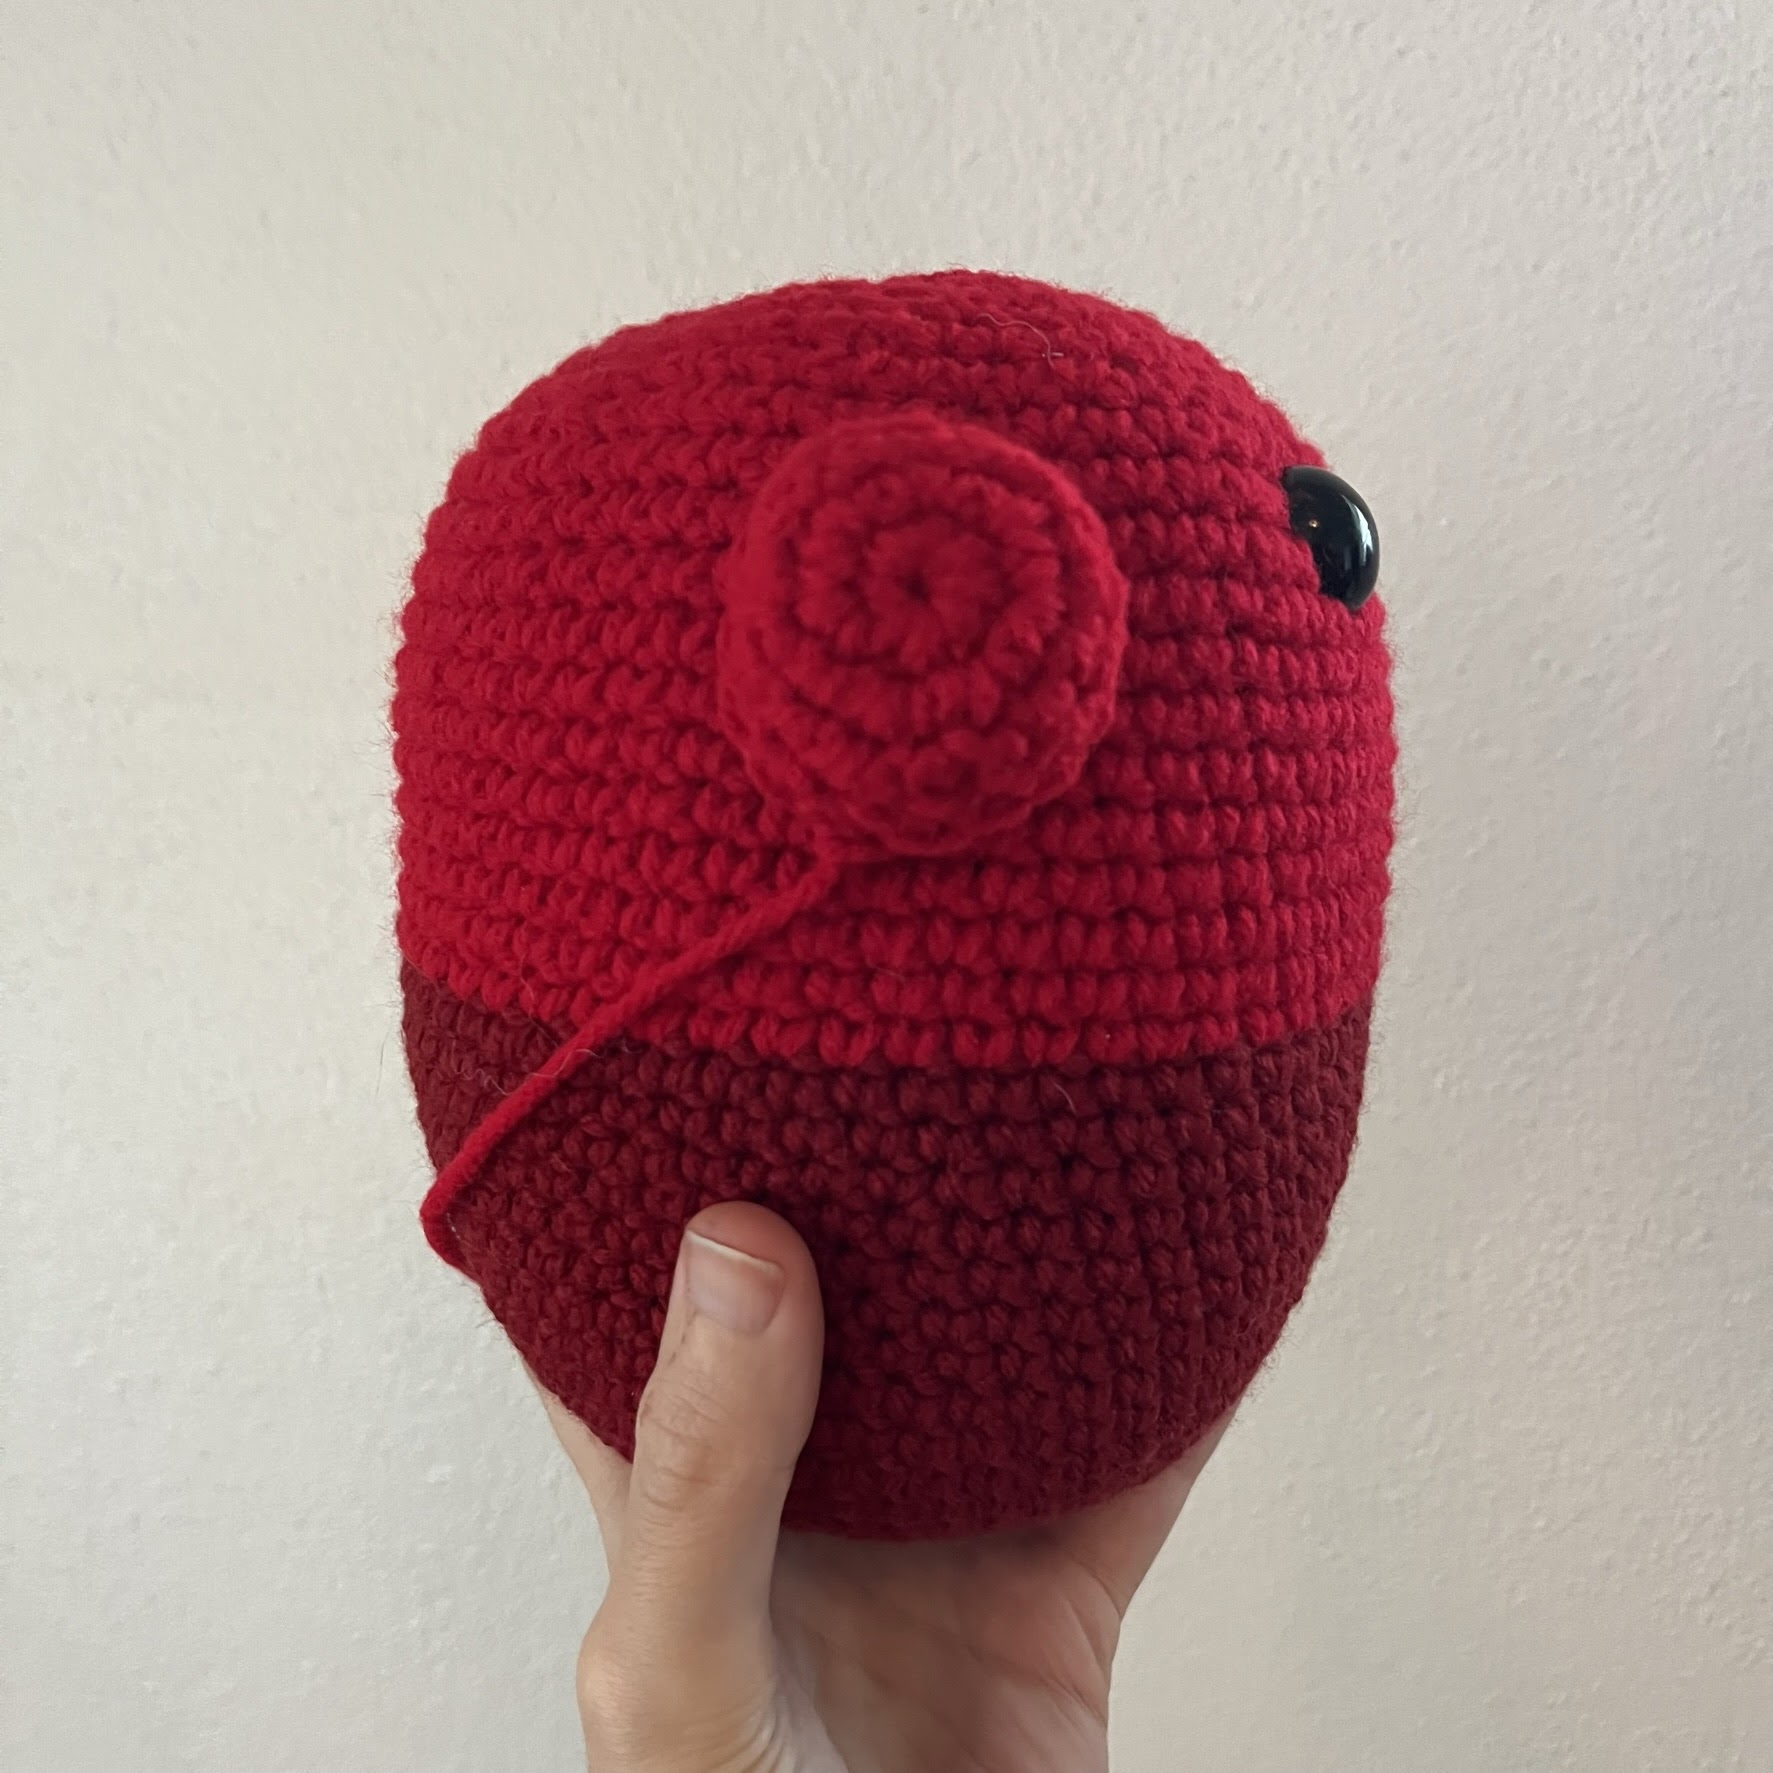
- At the time of me making this, I’ve found 3 Wilbys in-game: green, red, and blue. The green one appears to have black eyes and mouth, while the red and blue have darker shades of the main color. DO WHAT YOU WANT. I did my red Wilby pictured with black.
- Stuffing material
- Size F crochet hook
- Yarn needle
- Stitch marker
- Pins (optional, but recommended for positioning the parts before attaching – I use bobby pins)
Abbreviations/Skills Needed
Ch:
chain
Sc:
single crochet
Inc:
increase
Dec:
decrease
St/sts:
stitch/stitches
Rnd/rnds:
round/rounds
All rnds are continuous, so a stitch marker is good.
Gauge: approx. 4 sts/in and 4 rows/in. but gauge is not all that important
Finished Wilby is about 7" tall. I was trying to make it to scale. You can resize with larger or smaller hooks/yarn.
PATTERN
Total number of sts is noted in parentheses ().
BODY
This is an elongated sphere. Start at the bottom with the darker shade of your chosen color.
Rnd 1: ch 2, work 7 sc in 2nd ch from hook (7);
Rnd 2: inc around (14);
Rnd 3: * sc, inc, repeat from * around (21);
Rnd 4: * sc 2, inc, repeat from * around (28);
Rnd 5: * sc 3, inc, repeat from * around (35);
Rnd 6: * sc 4, inc, repeat from * around (42);
Rnd 7: * sc 5, inc, repeat from * around (49);
Rnd 8: sc around (49);
Rnd 9: * sc 6, inc, repeat from * around (56);
Rnds 10-19: sc around (56), 10 rnds then switch to your lighter color;
Rnds 20-30: sc around (56), 11 rnds;
Rnd 31: * sc 6, dec, repeat from * around (49);
Rnd 32: sc around (49);
Insert the eyes at about rnd 30 with 8 sts between the inner edges. Position the beginning/end of rnd in the back to hide any jogging from the color change.
Rnd 33: * sc 5, dec, repeat from * around (42);
Rnd 34: * sc 4, dec, repeat from * around (35);
Rnd 35: * sc 3, dec, repeat from * around (28);
Stuff the body moderately firm. You may need to add more stuffing before rnd 38 to ensure proper shaping. Make sure it’s not lumpy!
Rnd 36: * sc 2, dec, repeat from * around (21);
Rnd 37: * sc, dec, repeat from * around (14);
Rnd 38: dec around (7), close.
ARMS
Make 2 with lighter color.
Rnd 1: ch 2, work 7 sc in 2nd ch from hook (7);
Rnd 2: inc around (14);
Rnd 3: sc 6, inc x2 (16);
Rnds 4-5: sc around (16), 2 rnds then break off and leave a long tail for joining to the body.
Position each arm so that the top edge lines up with the top edge of each eye and roughly centered on either side of the body. Add a bit of stuffing and attach as shown.

LEGS
Make 2 with lighter color.
Rnd 1: ch 2, work 7 sc in 2nd ch from hook (7);
Rnd 2: inc around (14);
Rnd 3: * sc, inc, repeat from * around (21);
Rnd 4: sc around (21);
Rnd 5: * sc 2, inc, repeat from * around (28);
Rnds 6-9: sc around (28), 4 rnds then break off and leave a long tail for joining.
Position the legs a bit more toward the front of the body and tilted slightly down. Add stuffing to make them nice and round. See the images below if you need help positioning!


Finishing: Stitch on the mouth!

The end!


Comments
Post a Comment